Print & Creative Services
Print Guide
Online Ordering Portal Documentation
With the new online ordering system, you can easily explore and order products, track your order status, and reorder items at your convenience.
Accessing the Online Ordering Portal
- To access the online ordering portal, click the nine dots icon in the top of any of your Microsoft365 apps such as Outlook Webmail. This opens up your app drawer.
- Click on the Print Plus portal link to automatically log you in, or click on "All apps" and scroll down to find the Print Plus portal.
Note: You can also access the portal by going to aka.ms/myapps.
Exploring Products and Ordering Course Material
- Once logged in, explore the products offered by clicking on "Products" in the top menu or selecting a category from the drop-down menu.
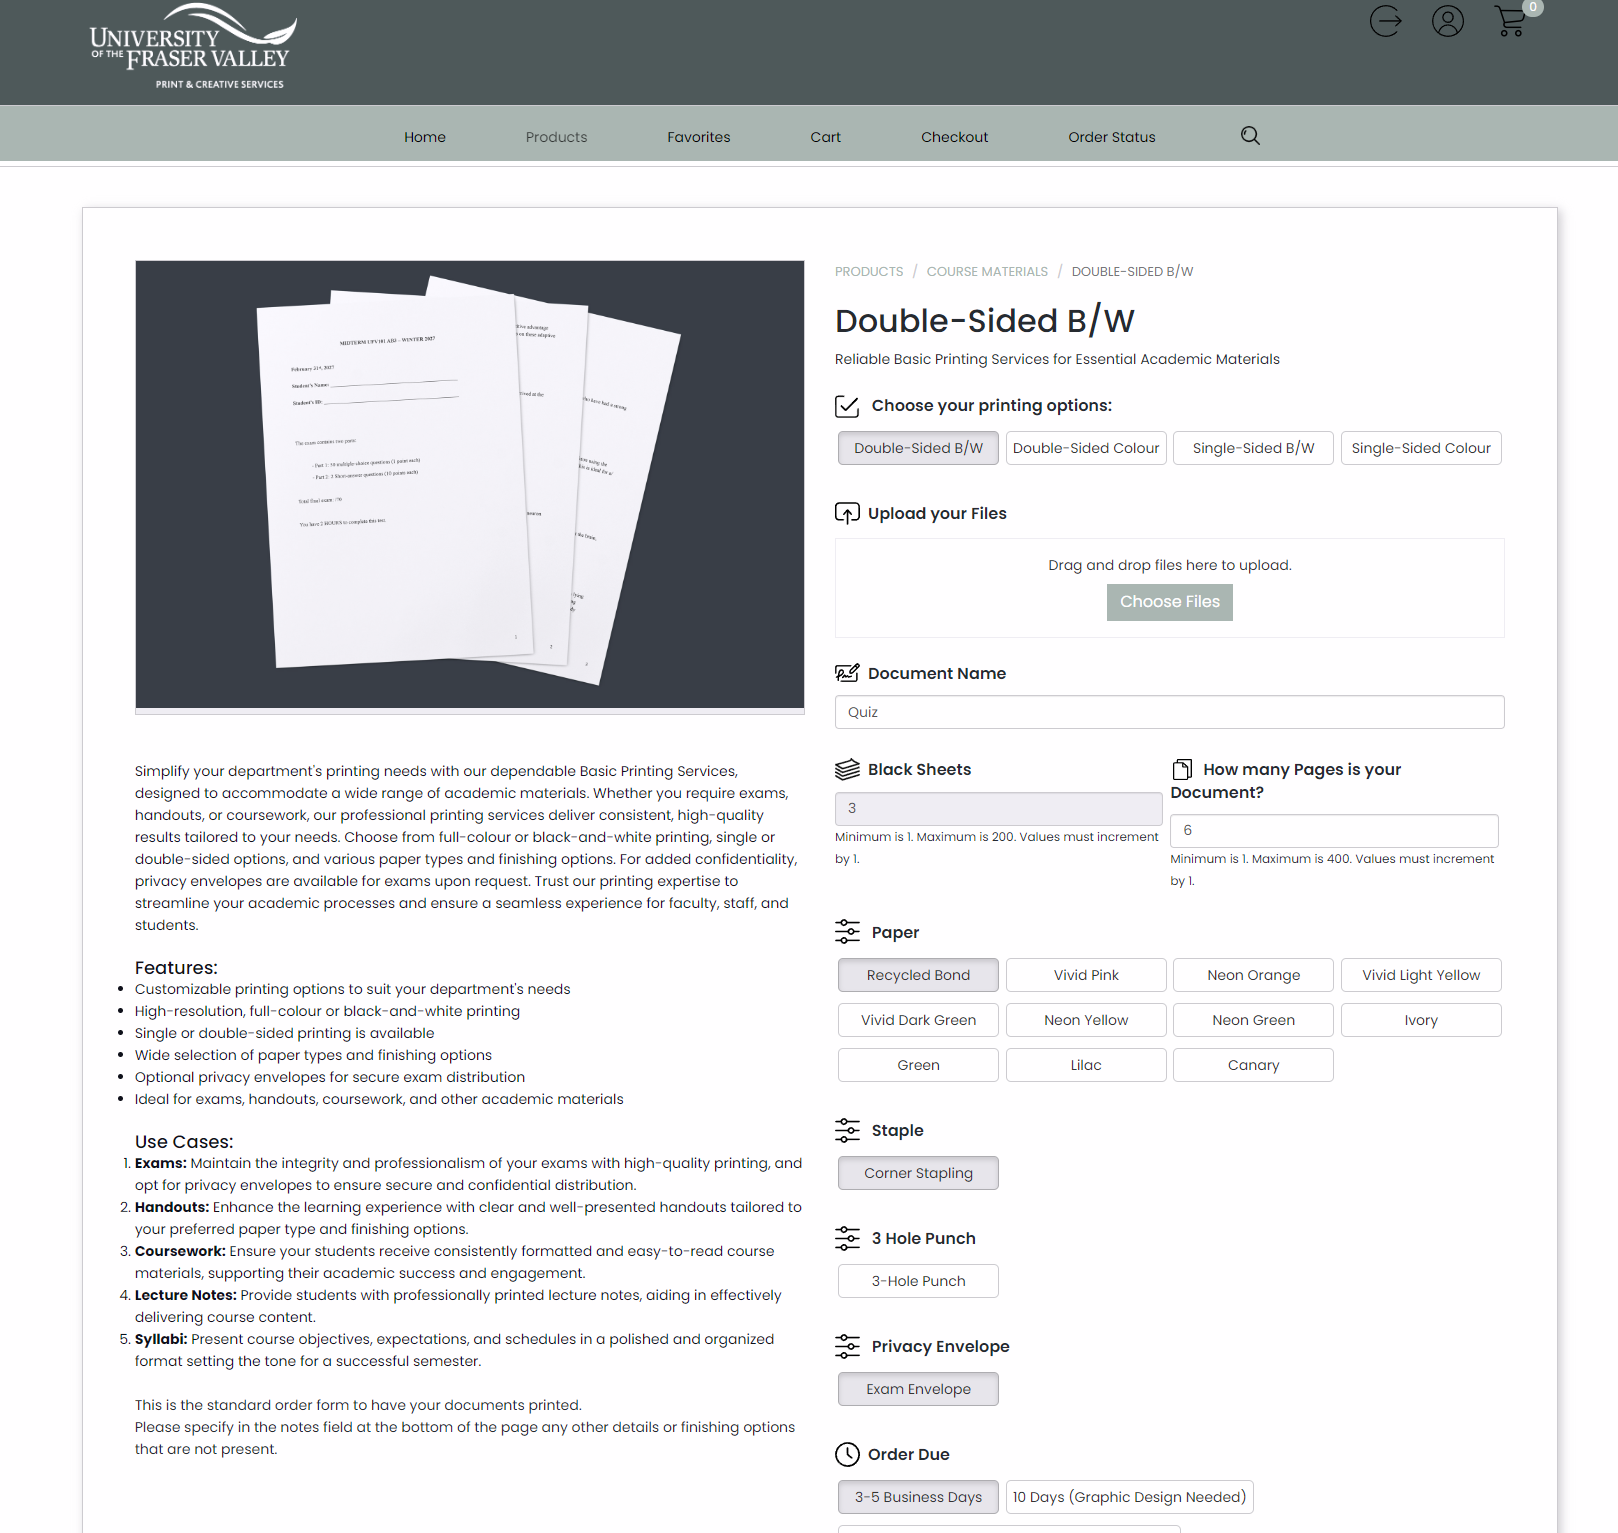
- To order course material, select "Simple printing".
- Upload your PDF by dragging and dropping it into the "Upload your files" area or by clicking "Choose files" and selecting the file through your file explorer.
- Choose your printing type, such as double-sided color.
- Enter the number of pages in your document. The system will automatically calculate the number of sheets needed based on your selected printing type.
- Enter an optional document name for easy reordering in the future.
- Select your desired paper type and finishing options, such as corner stapling, three-hole punch, or privacy envelopes.
- Choose your budget code. If you encounter any discrepancies, contact support via email.
- Enter the desired quantity, review the approximate price, and click "Add to cart".
Checking Out
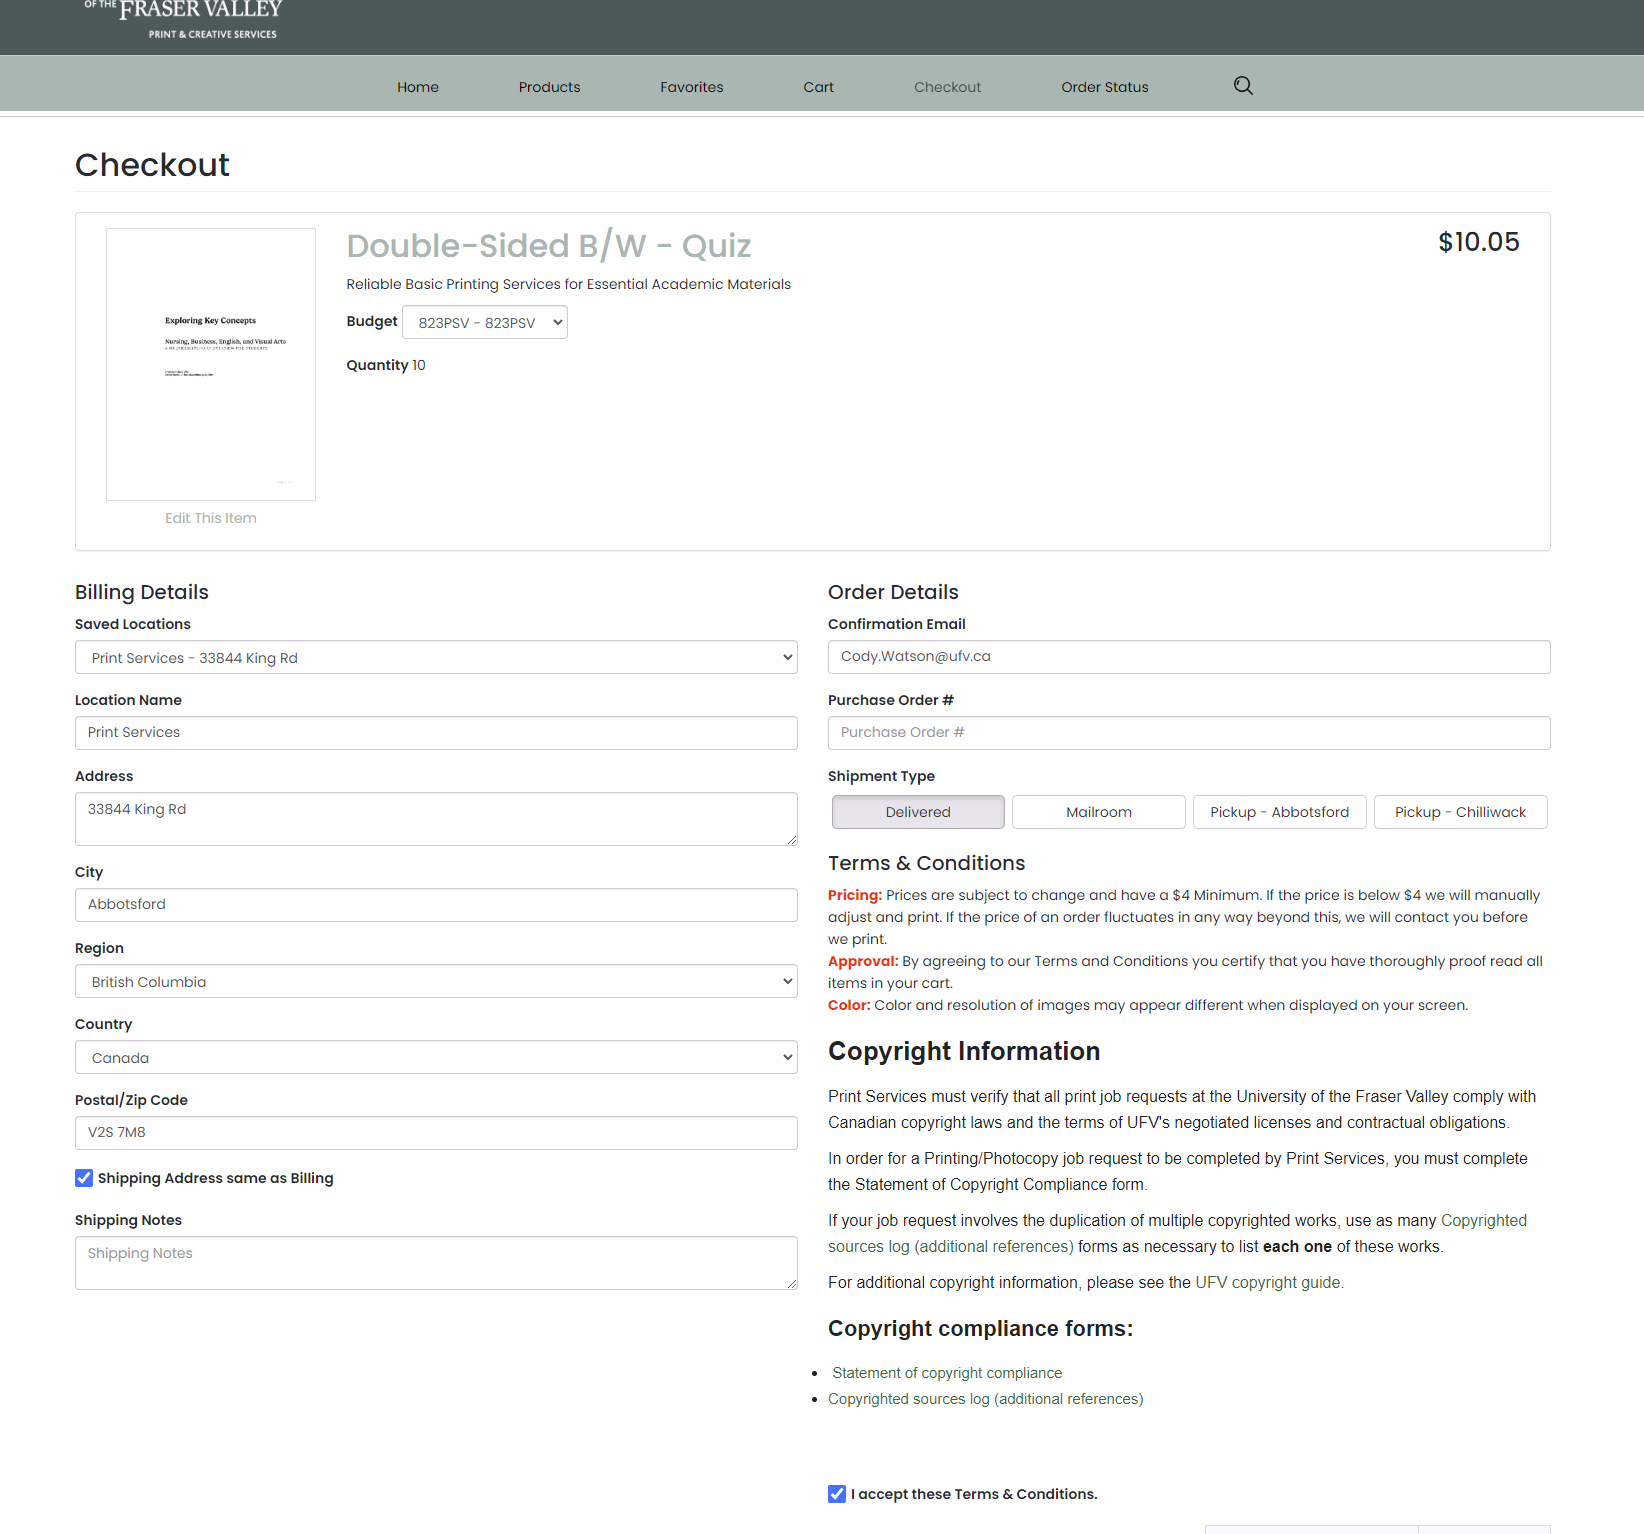
- Review your billing details, including your address. Update your address if necessary.
- Accept the terms and conditions and review the copyright compliance information.
- Confirm your shipping details, including room number and building. You can add this information in the address field.
- Choose "On Account" as the payment type to charge the order to the selected budget code.
- Submit the order and receive an order confirmation email with your order number and details.
Checking Order Status and Reordering Items
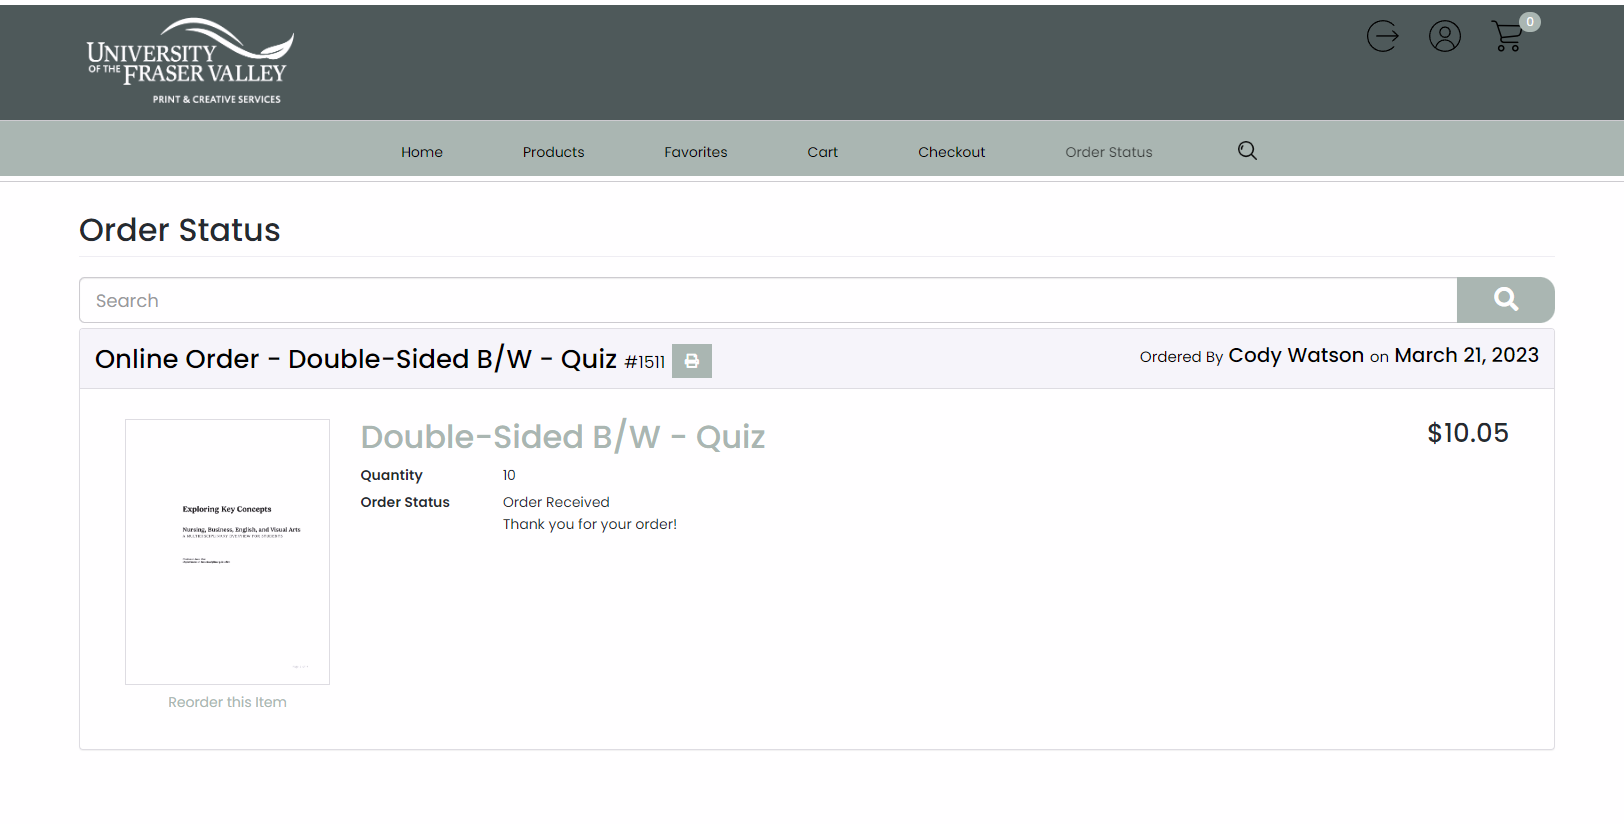
- After placing an order, you can log into the Print Plus portal to view your order status.
- Track your order progress as it moves through production, finishing, and shipping.
- To reorder an item, visit the order status page for that item and click the "Reorder this item" button.
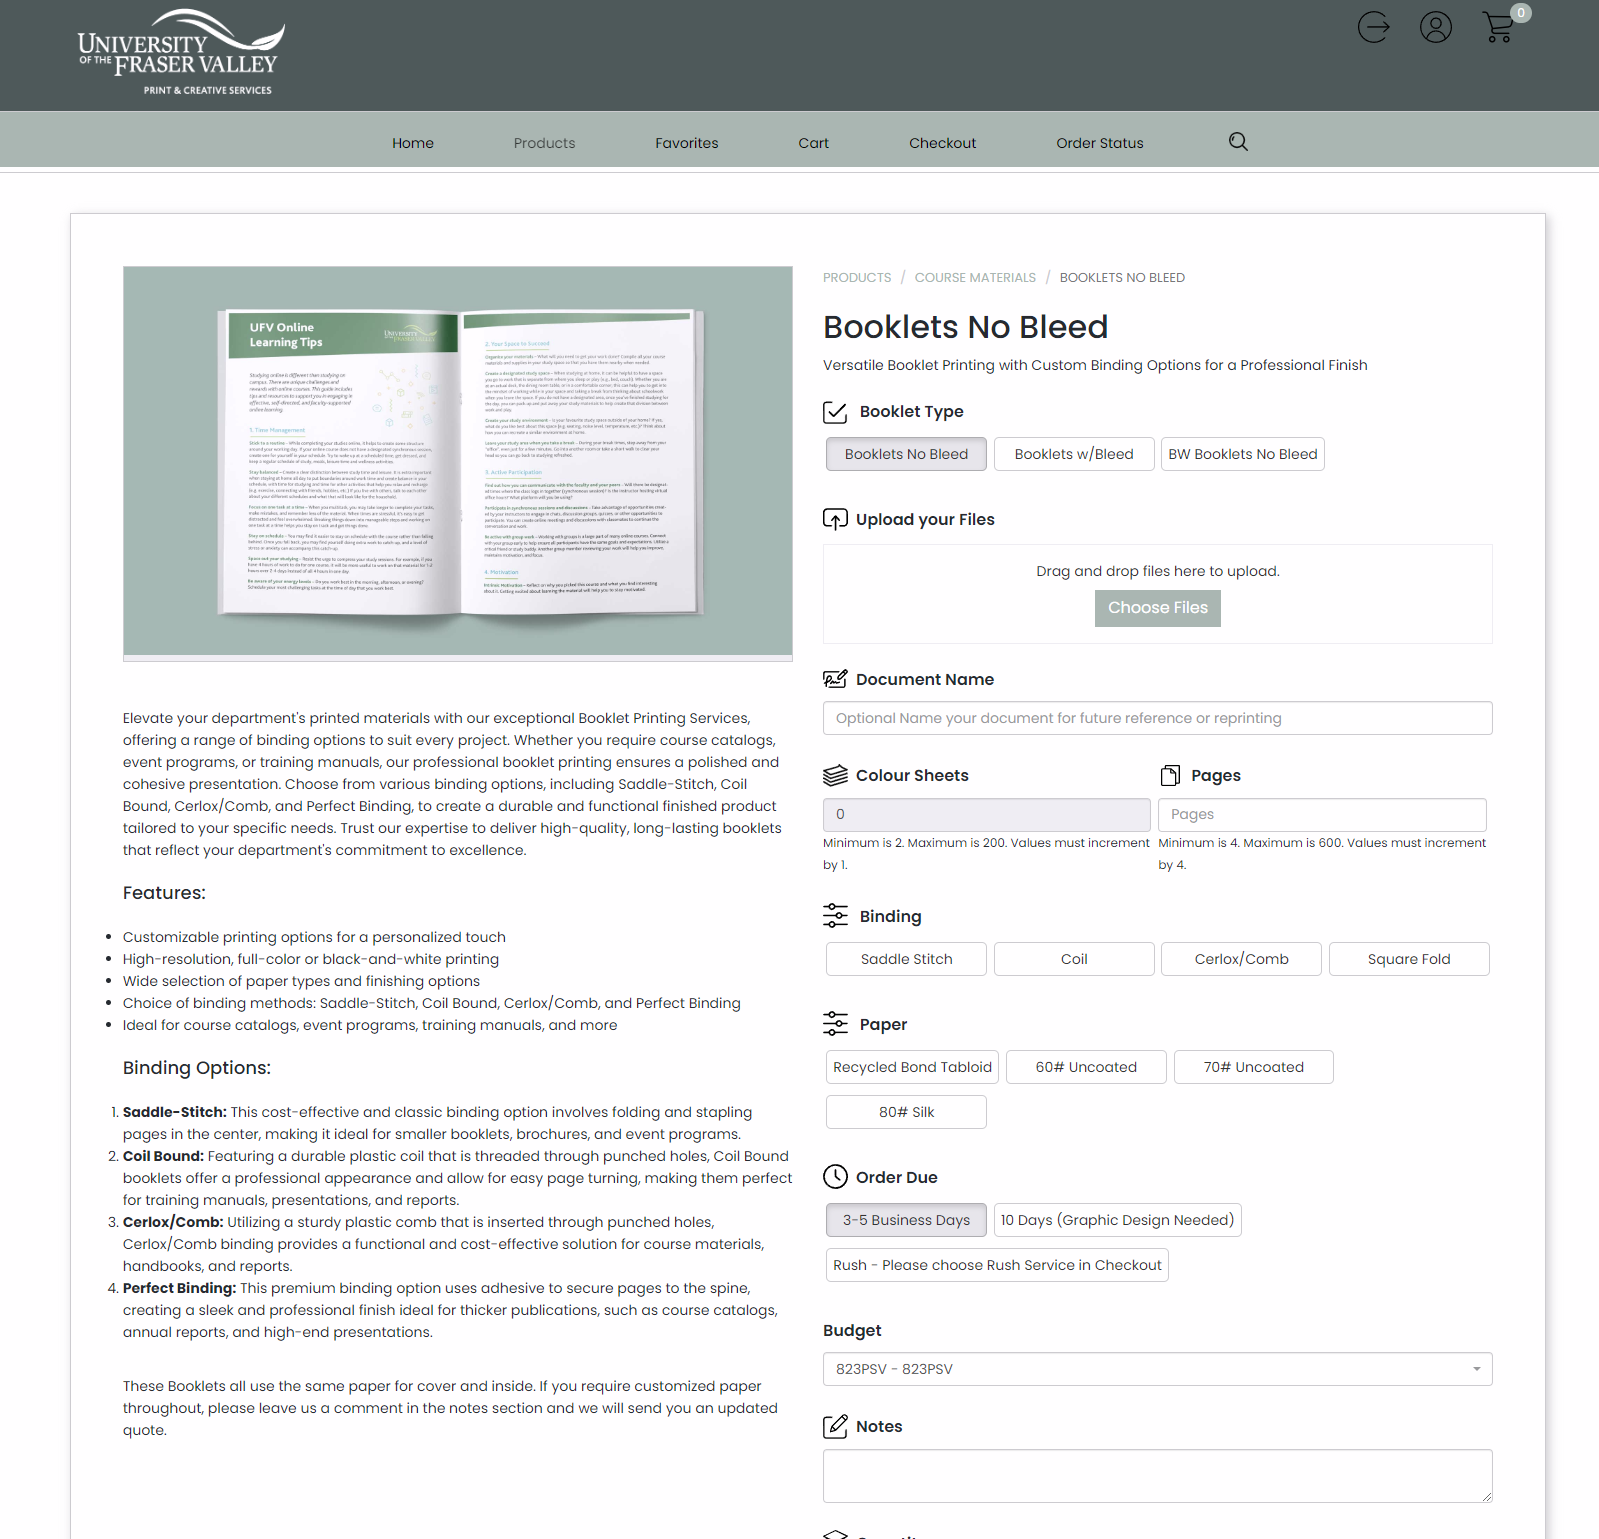
Ordering Booklets
- Choose from booklet options such as booklets with bleed, booklets with no bleed, or black and white booklets.
- Select the desired booklet type, and the preview image will update accordingly.
- Enter the number of pages in your booklet and choose your paper type.
- Make sure your budget code is selected and enter the desired quantity.
- Add the item to your cart and proceed to checkout.
- Review and accept the terms, select "On Account" as the payment type, and update your shipping details if necessary.
- Submit your order.