
Optimize your image for the web
Stick to high-value images
Images take up valuable space on a web page and they eat up your user’s data plan. They can also slow down your page load speed. Whenever you add an image to your site, ask yourself, “does this add value to what I am communicating to my audience?”
Keep the file size small
Use images that are about 100 kb (kilobytes) or less. This shortens the page load time, which means your users are less likely to get impatient.
Crop for UFV layouts
-
Banners should be 1700 pixels wide and 360 pixels tall. If the image is difficult to crop, 390 pixels tall is also acceptable. Large masthead banners can be 465 pixels tall.
-
In-page images should be 820 pixels wide maximum.
Is your image the wrong size?
Use a free editing tool like Canva or Gimp to crop and resize your images for the web.
Avoid detailed text in your images
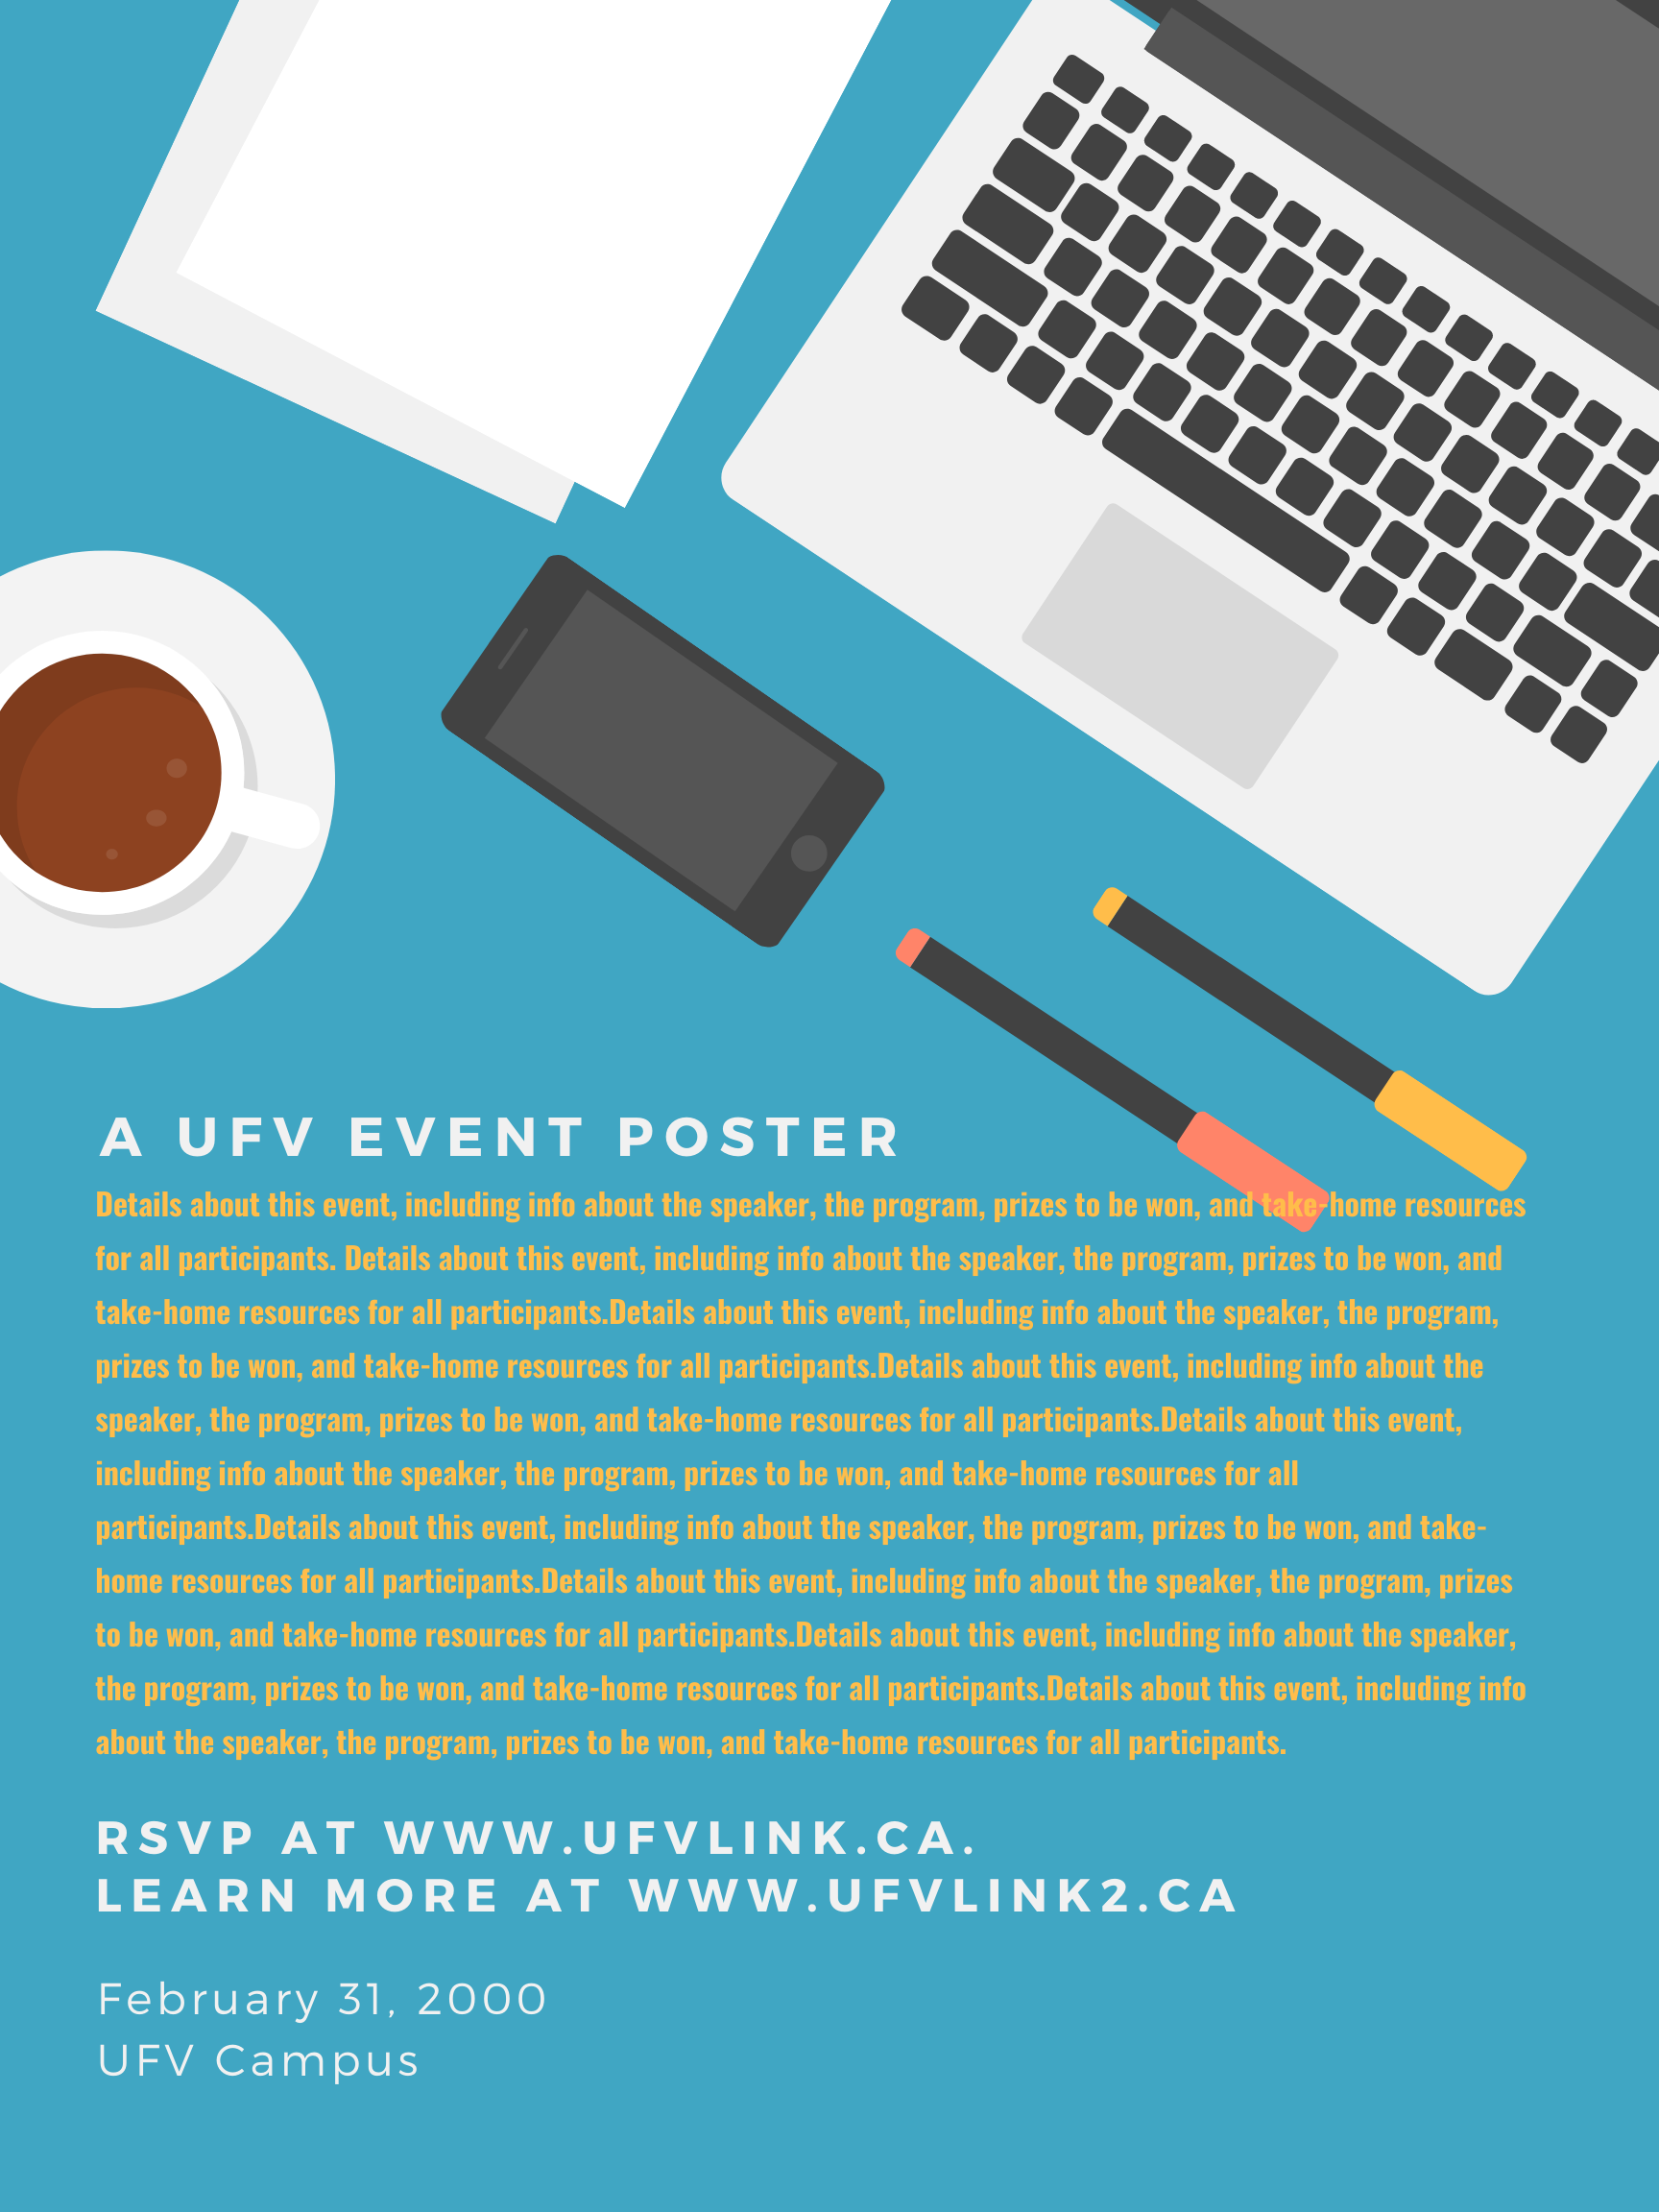
A tempting shortcut is to place the image of a poster on a webpage. Nicely designed... all the relevant info included... quick and easy upload... voila!
Why the web team recommends against this practice:
- The poster info will be unreadable on small screens. As the image shrinks for mobile users, the print will also shrink and become impossible to read.
- The poster info will not be accessible to visually-impaired users who rely on screen readers. (Learn more about making your content accesssible)
- Any links you include on the poster will not be clickable, which will be confusing and disruptive for users.
What to do instead:
Ask the poster designer to create a simple graphic that matches the poster but includes only the image and event headline. Post this image, and then include the event details and any relevant links below the graphic as web content.
Choosing the right image
Use genuine photos of UFV
Whenever possible, use genuine photos of UFV. They are more likely to be an accurate and unique reflection of our community.
Where to get UFV photos:
-
Download them from the UFV Flickr page or
-
Take your own. You can take your own photos at UFV public events or in UFV public spaces or common areas.
-
Request a photo shoot to be done by Community Engagement's Communications team.
-
Find UFV photos in T4’s media library (try the Global folder.)
Always get permission to use UFV photos:
Public events & spaces. Photos taken at UFV public events or in UFV public spaces technically don’t require signed permission from the people depicted in the photos. But if a photo focuses on a particular person and you plan to use it in a prominent way (for example, a web banner), it’s a good idea to confirm their permission.
UFV classrooms, offices, smaller spaces. Download the photo/video release form and get a signed release from everyone appearing in the photo. If you’ve requested a photo shoot from Communications, they will take the lead on this step.
If you’re not sure about a particular photo or need help obtaining permission, please check with Marketing.
Stock photos
When to use stock images:
-
When you are unable to find a suitable UFV image
-
To promote a smaller event or service (e.g. a photo of art supplies to promote a drawing workshop)
-
To convey an abstract concept (e.g. a photo of a tall cedar to illustrate being strong and grounded)
-
To avoid using real UFV photos when a topic is sensitive (e.g. use a stock image of a stressed-out student instead of a real UFV student)
Where to get stock images:
Please do not use Google image search to source clip art, design templates, or images. These are not "free for use" — they are the intellectual property of others. Instead, you can:
-
Search for an image at our institutional Getty royalty-free images account and then ask Marketing to download it for you, quoting the image ID number.
-
Use free stock images from a reputable site such as Unsplash, Pexels or Pixabay. Use these sparingly because they are likely to be in wide circulation already.
-
Purchase an image from a vendor such as Adobe stock or Shutterstock.
Always respect copyright and privacy
Make sure you have copyright to use the images and content on your web pages. If someone gives you images check with them as to where those photos came from, and get a record of written permission from the photographer and the people in the photos, if needed.
Read more about UFV and Copyright.